Before starting I want to mention some basic points you need to keep in mind for this mission:
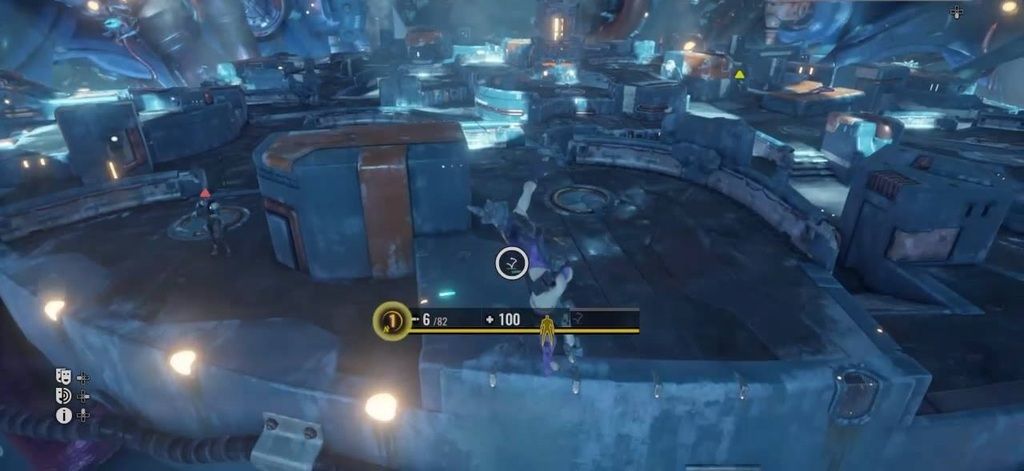
The Stage - This Map is specifically designed so you can benefit in taking cover from nearly any angle. This stage, if used correctly is going to be the thing that keeps you alive in the end.
 Organized Grunts
 - You wont be the only ones using the stage effectively. If you allow them, the grunts *Will* flank you and have you surrounded before you've taken a bar of health from The Boss.
One track Elites - As any elite, they will make beeline straight for you the second they track your Aleph signature. The thing that might kill you down the line is when you realized that they’ve been silent as they approached your blind spot.
Enemy Preferences - When hiding behind cover and either an Elite or Grunt begins making there way to you know that each one has a fixed attacking method. If its an Elite, know that they’ll Grapple first and ask questions later and Grunts will Strike you first with there Gun or Foot. That in mind when you do see an A.I approaching, take cover so they don’t shoot you. Always strike from cover for Grunts and Grapple for Elites. This is because you’ll always get the upper hand on them when it comes to attacking first if your under cover but if you grapple a Grunt from cover they often are fast enough to strike you back regardless, so strike first as its faster than grappling. You can choose to strike an Elite as well but that opens up the small chance that they dodge.

Mission Start: When you start, there will be both Elites and Grunts waiting nearby as well as The Council. During this phase of the mission The Council will not be hostile and will attempts to assess if you’re worthy of joining them by sending a continuous stream of Elites & Grunts. When destroying one of the 3 faces, more units will spawn, and attacks from an overhead machine will shoot streams of energy periodically. When all 3 faces are destroyed The council will combust, leading to the next part of the mission.

The 10 Council Members: After recovering from the last attack The Council will reveal themselves and come to the conclusion that you cannot be assimilated and will aim to kill you all the while gathering data through a series of tests. As you pass each test, more overhead mechanism will Activate periodically. During the first test The Council will activate either the Energy Streams, the bouncing Electrical Spheres or the Homing laser but never all 3.
Test #1 - Eliminate Soldiers.
Your first task is to kill a specified number of Fifth Council Soldiers. You will not be able to attack The Council directly during a Test. At this point will have 2 options:
1.
Fulfill the objective - As a Team or in solo you will have to kill a number of a specific type of enemy. This method will end any test with the council saying “Observation Concluded.” Both methods will damage the Council when completed.
Alternative
2.
Charge terminal with Aleph - At the the center of the stage is a large terminal that can be interacted with whenever a Test begins. Charging it activates all 3 mechanisms at the edges of the stage. Make your way towards one of the terminals while watching for both The Council to cross paths with you and from attacking enemy units from behind. If triggered when The Council gets directly in front of it, it will stun and deactivate its invulnerability. Triggering the switch too early will have The Council make a sharp turn in the opposite direction. Ending the Test through these means will result in The Council saying “Interesting… Lateral… Thinking.”

 Test #2
 - Eliminate Elite Soldiers.
When this test begins the circular platforms throughout the stage will open, sending out additional Elite soldiers. They will begin spawning continuously until the required amount is met. In addition, both the Electrical Spheres and Energy Streams will both be activated simultaneously at random points during the Test.
Note: Don’t let the bouncing spheres and the light show throw you off. Move around the edges of the stage and keep to cover. The center is the most dangerous area to be in.
Test #3 - Eliminate Minelayers.
Similar to the previous test you will have to focus your attention now to the ground as the Minelayers are small and erratic. These Minelayers do not travel across the map and do not chase the Raiders. They travel a set distance from where they spawned and where there are no mines. When this test begins it wont be long before you’ll see the stage littered with mines. At this point The Council will also begin attacking using a Homing laser strike similar to the type The Beholders use simultaneous with the other traps.
First you’ll want to focus on Grunts so they don’t take pot shots at you, then destroy nearby mines to draw the attention of Minelayers. If you lose track of where they are, you'll find them nearby any remaining mines. Try not to concern yourself with the Homing Lasers too much as it often loses track of you while your standing still (especially if your under cover).
Note: Honestly the best thing to do here is save up Aleph from the previous Elite Test so you can skip this Test using the Center terminal then the Council trap… just be careful to not rush to a certain location and get hit by a bomb as you might carelessly think, “I can take one hit” only to find theirs an Elite and Grunt waiting for you soon after.
Final Test - Eliminate Drones (Squids)
Unlike the Drones shown in other missions the drones used here do not have rotating Shields, lay Minelayers or move about the Map. These drone are stationary and placed at the edges of the stage. Aside from the goal of being eliminated there only other purpose is to launch stationary electric fields that does a steady stream of minor damage if you don’t spend time in them, which can be avoided easily.
What makes this test difficult; every trap and enemy shown throughout each of the previous test will activate and spawn from this point on. This can range from extremely difficult to mildly challenging depending on the groups MMR as the spawn and activation rate can be pretty slow to frequent. On either case what you should do is hug the walls or any other form of cover as you move to the outskirts of the stage. Don’t let grunts run around you, kill them on sight and lure elites away from grunts or traps. Remember The Council is throwing everything they have at you now, there desperate. Only when your sure your safe should you focus on The Council, there not going anywhere but around the bend.
I mentioned the outskirts being the safest allot because the bouncing sphere aren’t as dangerous, the Streams of Energy don’t rotate past the center, By the time the Homing Lasers start tracking you they’ve already moved to far to finish the lock on, Grunts cannot flank you, Elites can’t sneak up on you (unless they show up out of no where through the spawn points on the edge). The only thing you have to worry about then is the Minelayers and they don’t respawn fast enough, so just kill 3 at a time and you should have a pretty secure location.
 Side Note:
 sorry I didn’t include anything regarding Antagonist in this one. I think I crammed enough into it and as of now, I can’t think of a solid Anti-Antag solution other than Grouping up.